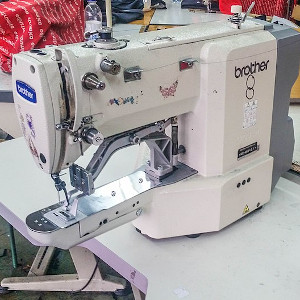
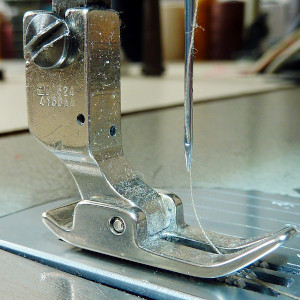
 Sewing is a pastime that many people enjoy. There’s something about creating your own work that gives a huge sense of satisfaction. What’s not so satisfying about sewing is when you’re in the middle of your project and the machine goes wrong.
Thankfully, if you own a Brother sewing machine, that shouldn’t happen too often. But if it does, don’t panic, as a lot of common problems can be fixed within the comfort of your own home without the need to take it in to be repaired.
In this article, I’ll go through some of the most common problems you may happen to come across when working on your Brother sewing machine and what you can do to solve them.
Thread Bunching Up
 This is a very common problem and can happen to anyone. Unfortunately, there are quite a few culprits that may have caused this. To solve this issue there are a few things you can try. First, re-thread the top, making sure the hand wheel’s thread line indicator is positioned at the top and in the correct place for threading. Mis-positioning will cause the thread to bunch up. If this doesn’t work, try re-threading the top thread with the presser foot raised. With the presser foot down, the tension discs are closed and therefore the top thread becomes slack.
If you’re still not having any joy after re-threading the top thread, check, and reset if necessary, the position of your bobbin case. Finally, check the tension settings and adjust to a higher setting. Hopefully, one of these solutions will get you up and stitching again.
Fabric Not Getting Fed Through
Another common problem you may encounter is when the fabric doesn’t feed through. If the machine has a drop feed, make sure this hasn’t been lowered accidentally. If it has, simply raise the feed and the fabric should glide through. In cases where a mechanical machine is being used, make sure the foot is lowered before attempting to sew. It’s also worth checking the stitch length on the machine as if it’s too low, the machine may struggle to feed enough through.
Machine Not Sewing at All
It’s very frustrating having a machine that won’t sew, but more often than not, it’s very easily fixed. The first thing to check in this instance is that the bobbin winder shaft has not been moved to the wrong position. Most bobbin winders need to be pushed to the left to work (check the manual of you’re unsure). Reposition this if need be. If this is not the issue, then make sure the machine has been threaded correctly and that the thread line on the handwheel is at the top.
The final thing to try in this scenario is to check your bobbin is fitted correctly. You can double-check the correct positioning in the instruction manual.
Snapping of Thread
Another common problem you’re likely to come across at some point in your sewing life is the snapping of your thread. If this keeps happening, there are a few things you can do. The first is to re-thread the machine, and as always, ensure the thread line indicator on the handwheel gets positioned at the top. Second, double-check the thread you’re using. If you want to produce good quality items, you need to use good quality materials, and that includes the thread. Make sure you are using a thread that’s strong and suitable for a sewing machine. Wherever possible, try and use a high-quality branded thread.
Another tip to prevent your thread from snapping is to always thread your machine with the foot raised. If the foot is down, the tension of the thread will be high. And using thread that’s tight and is hard to pull through is likely to cause it to snap.
A Word on Needles
 Using the incorrect needle for your machine can cause all kinds of problems. And on the flip side, using the proper needle for your project will guarantee a better finish, and you should have fewer problems overall. To help ensure you choose the right needle, there are just a couple of key things to remember. First, finer needles are best used for lightweight fabrics, while thicker needles should be used on heavyweight fabrics only. The smaller the number, the finer it is.
Second, never, ever sew with a bent needle. This is very dangerous and could cause serious damage if the needle were to snap while the machine was in use. A good way to check to see if your needle is bent is to place it on a flat surface, flat side down. Then check to make sure the gap between the surface and the needle is even.
Using an Incorrect Bobbin
Different sewing machines use different styles of bobbins. Not all of them are interchangeable and using the incorrect bobbin for your machine could cause some serious damage. So, to avoid this, always make sure you refer to the user manual to see the correct type and size of bobbin fit for your machine.
Never use a bobbin that’s not a Brother bobbin. Not only do you risk damaging the stitch quality or your machine, but you could also void the warranty if anything does go wrong. Also, be careful not to use a metal bobbin in any top-loading or quick-set Brother bobbin system.
Brother Sewing Machine Troubleshooting: Final Thoughts
Remember to take your time and investigate what the problem is before delving, going crazy, and making things ten times worse. It’s more than likely a simple case of mis-threading somewhere. So, just start from the top and work your way down until eventually, you will get to the problem.
Fixing common problems in your Brother sewing machine is not hard. More often than not, sewing machines can be fixed at home within a matter of minutes, provided you know where to start looking. And just by reading this guide, you are giving yourself a head start.


