
 Embroidering is one of the best parts of sewing. Not only can you embroider personal messages onto T-shirts, pants, curtains, and lovely home decorations, but you can transmit a feeling and an emotion by beautifully embroidering names and messages onto different fabrics and giving them as gifts to loved ones.
Embroidering letters can also be simple and fun, like embroidering your own towel with your name on it or embroidering goofy throw pillows with silly messages. In truth, there is really no end to how creative you can be when embroidering letters.
But you need to know how to do it. If you have a dedicated embroidery machine, whether a single needle or multi-needle, there is not much you need to know. And I imagine if you have a dedicated embroidery machine, you are already something of a professional.
Today we will look at how to embroider by hand. You will learn how to embroider letters and initials on different types of fabrics using a variety of methods.
How Do I Design Letters for Embroidering?
Before you start embroidering letters, you have to get the letters on the fabric. There are a few different ways to do this. Since we are doing it by hand, you will need to design the lettering yourself.
Most people like to use full capital letters when embroidering unless they are writing a slogan or something similar. You are free to add as much artistic flourish as you wish to your writing, including overlapped letters, frilly cursive writing, and big block letters. It is totally up to you.
Here is how to prepare your fabric for lettering.
Method 1: Freehand Drawing
With this method, you will draw the design directly onto your fabric in your own handwriting. You can even let your child write their name or initials as a cute souvenir of their childhood for later years.
I recommend using a baseline for all your letters, otherwise, they may come out different sizes. Use a proper scale to accurately draw the size of your letters onto the fabric. You also want to make sure that the spacing between the letters is perfectly even so that it doesn’t look silly when finished.
It doesn’t matter what you draw the lettering with since it will be embroidered over.
Method 2: Stencils
 There are two ways to use stencils for embroidering letters. You can make your own using PowerPoint on your computer, or you can buy them from the local hobby store or from online. There are countless options for stencils to be found all over the online marketplace.
If you are going to use PowerPoint, you can use the text effects to make any kind of lettering you want. You can then scale it to size and print it out to become a usable stencil. The great thing about PowerPoint is that you can create as you go, deciding on text patterns as they pop into your mind.
Once you have printed out your letters in their proper size, you can trace them onto some tracing paper using a pencil or you can transfer them straight onto your fabric by using a carbon sheet.
Method 3: Embroider Over Paper
This is definitely the laziest method for letter embroidery. This is when you take your letters, either printed off the computer or handwritten by you on a piece of paper, then place the piece of paper over the fabric and simply embroider through it.
This avoids any copying or confusion. It is also a little sloppy. But it definitely works.
For a beginner, this is a great method just to get you used to the practice of embroidering and stitching letters. I recommend Roman letters to start as a novice.
How to Embroider Letters
Now it is time to do some embroidering. It is important that when you start you have the centers aligned. What I mean is that the center of your letter design and the center of the space where you are placing it on the fabric is perfectly centered. This will avoid later frustration.
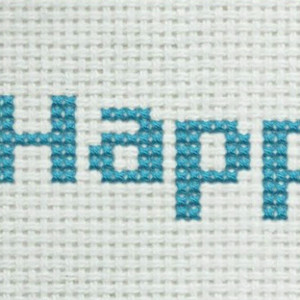 Method 1: Cross Stitching
Cross stitching works really well with letters to make a subtle yet appealing design. This is one of the most favored ways to embroider letters. Feel free to go nuts with the pattern using whichever style of cross stitching works best for you. There are so many different variations that we can hardly dig into them all here.
Method 2: Chain Stitching
Just like cross-stitching, chain stitching is super popular for embroidering letters. And just like with cross-stitching, there are at least 20 different kinds of chain stitches that can be used.
For example, the double chain stitch makes a thick outline for extra thick lettering and is great for bold monograms, whereas braided chain stitching can make for extra lumpy letters that really pop off the fabric. Chain stitching is one of the easier styles for beginners to start with.
Method 3: Satin Stitching
Satin stitching is great for making padded letters that have a three-dimensional look to them. Satin stitching involves a quick backstitch along the outline of the letter, then super packed satin stitches (small and straight stitches) over top of the backstitch. The end result is a fluffy, padded letter that stands out really well against the fabric.
If you want even bolder lettering, you can make double lines and particular satin stitches to fluff up the design. Then afterward, make a large padded stitch. This makes an extremely bold letter that practically jumps off the fabric.
Method 4: Herringbone Stitching
Lastly, we have herringbone stitches. These are great for filling in your letters. This method is ideal for larger letters with a lot of space to fill in. Another thing you can do is use the herringbone stitch on the wrong side of the fabric to make a very nice shadow that complements the lettering on the face side of the fabric. This is an advanced technique that takes a bit of practice.
How to Embroider Letters: Conclusion
Now you have the tools to embroider letters on any kind of fabric using a ton of different methods. There are still a lot of methods out there, but these are great starters. Now go out into the world and do some embroidering!

