Embroidery is a wonderful craft that dates back to ancient times. It is believed that embroidery was an art passed down by the Greek Goddess Athena. Over time the art has evolved and has gained immense popularity. But what happens if there is a mistake in your work or an embroidered item in your procession. Can that be fixed? Why Not! Here are a few guides, which will help you to understand how to remove embroidery and resolve all your ‘embroidery woes’ to give you that seamless finish you’re hoping for.
Important Tools For Embroidery Removal
 Depending on the methods you wish to try, you will need several different tools. However, as a bare minimum, you would require some tweezers, seam ripper, razor, lint brush, and loads of patience and time! While these are some basic tools easily found in any household. You might also want to invest in more advanced tools like an embroidery eraser. It will help you get a better finish if you wish to remove machine embroidery. A seam ripper is the most useful tool if you are dealing with more intricate hand embroidered work.
Pro Tip! A wet thread is weaker as compared to a dry one. So, before you begin, it will be a good idea to dampen your embroidery thread with a sponge or cloth.
How To Remove Embroidery?
You need to figure out if you want to remove just a portion of the embroidery or the entire piece altogether. The next step is to determine if the embroidery was done by hand or by a machine as the removal process may be a little different in each case.
Steps To Remove Machine-Sewn Embroidery
It is known that a machine-sewn embroidery is a much tighter stitch as compared to a handmade embroidery. Hence, it is more difficult to remove.
Flip the garment up to the wrong side, like in all embroidery removal, and lay it out on a stable surface.
Locate the bobbin stitch and start working on cutting the stitches with your seam ripper until you cut around 40 stitches or more.
Make sure you have a stabilizer between your garment\fabric and the stitches, making sure all the stitches are cut until the stabilizer is exposed without damaging the fabric.
Once all the segments are completed, flip the garment over, and use a tweezers to pull out the stray threads.
P.S. DO NOT yank or tug at any stitch when you get some resistance. It could severely damage your garment\fabric!
Using a Seam Ripper
 Seam ripper may not be the fastest way, but it certainly is the easiest way to remove embroidery, especially hand-sewn embroidery.
Turn your project inside-out to avoid accidental damages to the visible end of the fabric.
Use an embroidery hoop during your project to ease the removal process.
Work your way slowly through the stitches layer by layer or section-wise.
In case of any resistance, you need to stop and check out what caused the interference.
Once you have cleared up the errors, remove the threads left behind on the fabric using a lint brush, tweezers, or duct tape.
Using a Razor
A disposable razor is another easy and budget-friendly tool to remove embroidery.
Turn over your fabric and run your razor over these stitches slowly and gently.
Once the blade damages the threads, you can pull away from the left-over threads on the fabric using a lint brush or tweezers.
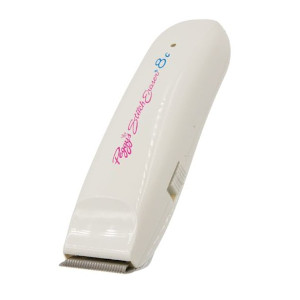
Using an Embroidery Eraser
An embroidery eraser is by far the best and fastest way to undo erroneous stitches. They are readily available online or in any well-known fabric store. It is an ideal choice to remove professional grade embroidery like brand logos on shirts, jackets, or caps.
As usual, you need to begin your project by turning over to the wrong side of the garment to avoid any long-lasting damage to the fabric.
You may experience a fuzzy type of texture if you miss out on turning over the garment.
Tear away any stabilizer attached to the embroidery before you begin.
 Place the embroidery eraser against the edge of the stitches, ensuring that the blades are digging into the tread more like the pushing shopping carts in your local departmental store.
If you are working on removing a logo, you would need to move the eraser across the entire design.
Once a segment is done, you need to lift the eraser and move it to the next segment.
Continue this process until all of the embroideries are shaved off.
Turn over the garment to its correct side and use a darning needle or a seaming needle to lift the shredded threads.
If all the thread is not removed, turn the garment over once more and run the eraser through the remaining stitches.
Lastly, use a lint roller or duct tape to remove thread dust from the fabric (on both sides).
An embroidery eraser is a great choice if you are a professional who deals with ‘unembroidered’ more often than others.
Dealing With Stitch Marks
Run a hot iron over the stitch marks to remove any odd stitch mark.
Set the temperature of your iron based on the type of fabric. For instance, use a hot iron for your cotton and a warmer setting for your silks.
Run your fingers along with the removed stitches and scrape your nails horizontally and vertically twice or thrice across them to smoothen out any holes left behind.
If in case holes are still visible, turn the fabric to the wrong side and gently repeat the process of steaming and scraping to get rid of the visible holes.
How To Remove Embroidery: Final Thoughts
Although removing embroidery is a time-taking and painstaking process, it sure is worth it for that much-loved garment you wish to restyle or rework on. Saving your favorite garment or reinventing an altogether new design is a satisfying activity if you do it with care and patience. It depends on you whether you choose to remove the embroidery or rework over the old embroidery. You know you have many options to choose from!

