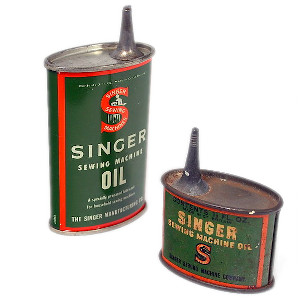
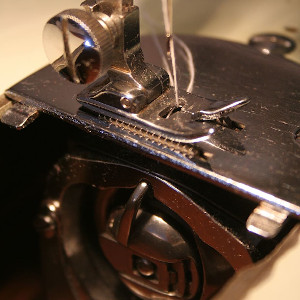
 Sewing machines come very handily in every household. Whether you need to sew worn-out outfits or want just to sit back and enjoy your favorite pastime activity, a sewing machine can literally save your day.
A machine needs to be oiled to function smoothly. You can oil the machine concerning the frequency of usage. Also, for finer clothing materials, e.g., silk, you require incredibly smooth gears. In that case, frequent oiling is needed to keep it fully functioning.
Oiling a sewing machine is a tedious process. Hence, many of us want a simplified protocol. Let us check the complete process listed down below.
Select The Perfect Oil For Your Machine
In general, every sewing machine manufacturer guides a favored oil for oiling the machine. However, industrial machines have different requirements. Their home-edition counterparts require other types of oil. The oils are generally produced from petroleum by-products.
Some oils present in the market are based on natural products e.g., palm oil or coconut oil. For industrial purposes, petrochemical-based lubricants are used. Although these are cost-effective, professional tailors are well aware of the toxicity of such lubricants. For domestic purposes, usage of natural product-based oil is recommended to avoid any mishap.
Some user manuals demand specific lubricants to be used. In those cases, use the recommended lubricating oils.
Use gloves and a face mask at the time of oiling. This will protect you from harmful fumes. Always clean the machine first.
Clean The Sewing Machine Before Oiling
 The most important fact about oiling a sewing machine is to clean it before oiling. If you do not clean before oiling, dirt and other unwanted residues will remain stuck in the gears. This may damage its mechanism in the long run.
For cleaning the machine, you need to turn it off first. You have to remove all the parts that can obstruct the cleansing procedure. Next, you have to remove the stitch plate and needle for safety purposes.
For cleaning large areas, you can use a microfiber cloth. This picks up all the dust particles from the machine surface. To clean any lint, you can take the help of a paintbrush. If you use a bobbin hook, you can clean the same with the brush too.
There are some nooks and crannies of the sewing machine, where neither a brush nor a cloth can reach. For such areas, use tweezers to pick up lint or other particles.
For finer areas, you can use canned air. Although you need to be careful as the puff of air can blow lint away further inside. For the best results, hold the air can 3-5cm apart from the machine and spray the air at an angle.
To clean the needle plate, you need to unscrew the plate and simply clean with a cloth or spray canned air.
For the bobbin hook & bobbin loading area, use the paintbrush and compressed air.
Lubricate The Machine Parts
 As mentioned before, you can either buy professional sewing machine lubricants or use natural oils (for households, using natural oils are safer).
You will need very few drops of it. The user manual of your machine will tell you the exact quantity.
First, you have to put a few drops of oil beneath the bobbin case. This region is also known as a housing unit.
This should immediately be followed by adding 3-4 drops of oil into the shuttle hook. Shuttle hook is the spinning element of a bobbin casing.
The casing and the hook generally rub together at the time of operation. Oiling both parts will decrease noises and also make the machine smoother.
Lastly, the outer casing of the hook should be oiled. Put a maximum of 2 drops and leave it for some time.
Do not be impatient. Disassemble one part at a time to avoid any hesitation or confusion.
Get Rid Of The Excess Oil
This step is significant. If you leave excess oil in the machine, it might damage the cloth used by staining it. That will ruin all of your hard work.
If you see any residue on the foot pedal, bobbin or needle area, wipe it clean with a microfiber cloth.
If you are a newbie in this field, you might take time to get a hold of the technique. In this case, keep a spare old silk cloth handy. Run it through the machine once to get the excess oil out.
Another pro tip is to use a damp soapy cloth over the areas of the oil spill. Keep it for 5-10 minutes and voila!
Do A Test-Run Of The Machine After Oiling
 After the oiling procedure is complete, assemble every single part with patience. We suggest that during disassembly, tag every part and keep them separately.
After assembling, leave the machine for a good 30 minutes. After that, run an old fabric through it. Do complete tests on the machine by setting bobbing pin, hook, and case. Use different speed settings as well.
This will ensure the perfect functioning of the machine. In some cases, parts do not fit properly after oiling, and sewing might damage the clothing materials. A proper test run is required to ensure that everything is under control.
How To Oil A Sewing Machine: Final Thoughts
Oiling sewing machines take a lot of time and patience. You should not get stressed or panicked. Organize your cleaning tools, oil, and machine parts with care. Proper organization of components will help you to complete the process without making any mistake. Always keep the user manual of the machine handy. High-tech machines have very intricate parts that require specific guidelines for oiling. Read the manual before starting the process.
Sewing is an art. You can create wonders with just a piece of cloth, fabric threads, and the machine. Staying calm and composed is the secret of sewing. Oil your machine regularly, take care of it by changing parts at designated intervals. This will improve the performance and lifespan of your machine and create masterpieces time and time again. Best of Luck!


