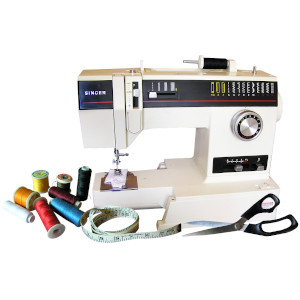
 Have you ever wondered how to use a sewing machine? Have you ever watched someone running fabric under the needle and contemplated to yourself, I wonder if I can do that? Well, you are about to learn how! This is a complete guide on how to use a sewing machine.
This is going to be a complete step-by-step guide on how to operate a sewing machine, not on what the individual parts are or how to thread the machine. This guide assumes that you already know what the machine pieces are, and that the machine is already threaded and prepped for work.
Now let’s get to it.
How To Use A Sewing Machine: Step By Step Guide
Step 1: First you will select a straight stitch. You may need to look at your manual to figure out how to make the selection on your machine. Generally, stitches are set by rotating the knob on the machine’s right side until it clicks.
Be sure to always set the stitch with the needle in the up position, as changing the stitch may cause the needle to move. It is important to note that a straight stitch is used almost always for sewing seams. Zigzag stitches are mostly used just to prevent edges from being frayed.
Step2: It is a good idea to practice on some scrap fabrics before you start your journey. For your first sewing attempt, I don’t recommend using any heavy fabrics. Denim and flannel are not easy to sew because of how thick they are. Try something easy like cotton.
Step 3: Place your fabric under your needle, positioned so that most of your fabric is on the left side of the machine and the right side of the machine is mostly clear.
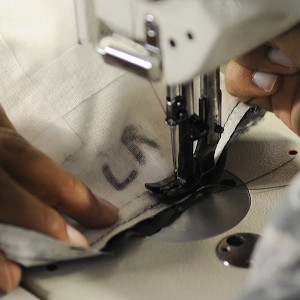 Step 4: Lower the presser foot. You can do this by activating the lever either behind or beside the needle itself. The lever will raise or lower the presser foot. Once you have lowered the presser foot onto your fabric, pull gently on the fabric to ensure the machine is gripping it firmly enough.
If you are very new, you might not know that something called the “feed dog” is responsible for moving the fabric under the needle. You don’t actually pull or yank the fabric, the machine does it for you.
Step 5: For the first several stitches, you need to hold the loose ends of both of your threads to stop them from going into the fabric. You can let them go after you have stitched a short bit, then go on to control the fabric and the machine with both hands.
Step 6: It’s time to hit the gas. The foot pedal is just like the gas pedal in your car. It will control your stitching speed. The harder you push it, the quicker you will be sewing. You want to start slowly just to get the feel of it, then speed up as you get more comfortable.
It may be important to know that some machines have on/off buttons that do not require the use of a presser foot, while other machines have a kneebar instead of a foot pedal. Either way, every machine will have some way for you to choose your speed for stitching.
Now that you are stitching, remembering to never force the material or yank on it while it is being threaded by the needle. The machine is going to do all of the hard work for you, and you merely need to steer the fabric in the direction you want it to go.
 Step 7: Try out the reverse lever. It will either come as a button or a lever, and it works to reverse the dog feed so that you are stitching backward. Sometimes, especially on older machines, you will find that the reverse lever comes spring-loaded. You will need to hold it to sew in reverse.
Step 8: Now you can practice releasing your fabric. Use the handwheel to get the needle into its highest orientation, then raise the presser foot. You will now find your fabric will come out effortlessly. However, if the thread pulls back during your attempt to take the fabric away, you need to check the needle position.
Step 9: When you are finished, you need to cut the thread. The cleanest way to do it is with a pair of scissors. You will leave a small tail with the machine for starting your next seam. Some machines also have a small notch near the presser foot that you can use to cut the thread.
Step 10: Now that you are pretty well acquainted with the machine, it is time to sew a seam. To do this, start by pinning two pieces of fabric together near the edge. You want your seam to be about half an inch from the edge of the fabrics. Once you are set, go ahead and practice joining the two pieces of fabric to create a seam.
Step 11: The last thing you need to practice is how to sew a corner. Some corners are extremely sharp. When you need to turn on a dime, simply lower the needle way into the fabric using the handwheel, then raise the presser foot while leaving the needle inside the fabric, and rotate the entire piece of fabric into its new position, the needle still inside it.
With your fabric now in its proper position, you can lower the presser foot and keep on sewing.
Step 12: Start Sewing
Congratulations, you now know how to use a sewing machine. By following these easy practice steps, you can get yourself prepared for your first project. The hardest part is getting comfortable with the basic maneuvers of the machine itself. The first 11 steps are all crucial to mastering your sewing machine.
Once you are feeling good and comfortable, I highly recommend trying your hand at a simple project like sewing a pillowcase or a cloth bag.

