 You probably want to know how to make a table runner, but first… what is a table runner?
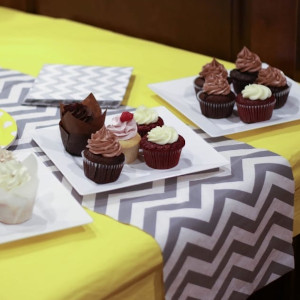
Have you ever been to somebody’s house who was a little bit fancier than you? You may have noticed what you thought was just an ordinary decorative cloth draped across their dining table. But in fact, this piece of cloth is actually referred to as a table runner.
Table runners can add a splash of color to any dining room, and they can be used for special occasions. You will often table runners matched with coordinated tablecloths, napkins, and other interior decors inside of the dining room. Making a table runner is a great way to revitalize your dining area by adding a burst of color and smart design. It is easier than you think to go from drab to fab!
Making a Table Runner
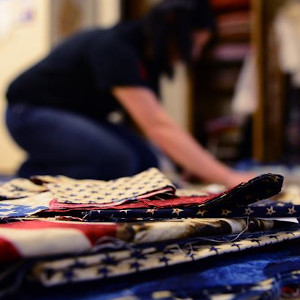
Making a table runner is actually really simple. Even if you are a beginner, there is really nothing to it. I mean, it is just a long piece of fabric stretched over your table. There are not many corners or seems that you need to tackle.
Keep in mind that when you finish the table runner, you may want to use the same fabric to create matching placements, fabric napkins, and even chair backings. If you are feeling up to it, you might also consider customizing your table runner by adding pompoms or fringes at the ends for an even more dramatic appearance.
Now, let’s make our table runner! Here are the supplies you will need:
- 75 Yards of Cotton Fabric
- Straight Pins
- Sewing Machine Thread (Color Coordinating)
- Scissors
- Ironing Board Yardstick + Iron
For the sake of consistency, we will say your table is 6’ long. That means you are going to want a table runner that measures at least 8’ in length. Most people prefer to have a table runner that drapes over the ends of their table. That said, you don’t need it to hang over. You are totally welcome to design your table runner to only reach the edges of your table. All you need to do is shorten the total length of your cuts.
Before starting, be sure to wash and dry your fabric so that it shrinks. Iron your fabric flat and then cut two lengths of fabric that measure 15” x 98”. Keep in mind that if your table is not 6 feet long, you will have to compensate for these measurements.
How To Make A Table Runner: Step By Step Guide
Step 1: With your 2 cuts of fabric, you are now ready to rock. You want to place the 2 right sides of your fabric over each other while keeping the edges flush. You will pin around the edges of your table runner by using straight pins and by keeping them about 5 or 6 inches away from each other.
 Step 2: leave an unpinned space wide enough for your palm to fit all the way through on one of the long sides of your fabric. Now you place your table runner underneath your needle, lower the presser foot, and begin immediately with a backstitch.
You want to continue stitching along the perimeter edges with roughly a quarter-inch between your stitching and the fabric’s edge. When you come to a corner, raise the presser foot and turn the entire table runner at a right angle. This will ensure you can continue stitching properly along the table runner’s perimeter.
Step 3: You can now trim your corners, but make sure that you do not cut too close to your stitches. You want there to be some breathing room for when you turn your fabric right side out. This will also make for sharper corners.
Step 4: Now it is time to turn your fabric right side out. You can poke the corners out by using the dull point of your scissors or the eraser side of your pencil. You do not want to punch a hole through the fabric, as that could prove disastrous. But you do want to apply a bit of pressure. You want to press your fabric extremely flat so that it regains its shape. Then you will iron it flat on a steam setting.
Step Five: You will now need to pin the gap closed so that the hem you just ironed is tucked inside to make a perfectly clean line. Place your table runner underneath your needle once again, lower the presser foot, and begin stitching around the whole perimeter, again using 1/4 inch of space between the edge of the fabric and your stitches.
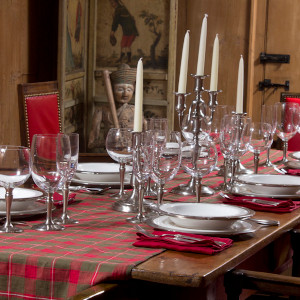
By doing this, you are naturally closing the gap and providing a very nice finished appearance to your table runner. Finally, iron the entire thing and place lengthwise on your table. You will notice an immediate difference in the style and mood of your dining room. This entire process should have taken under 30 minutes.
Extra Tips
 I highly recommend choosing a piece of fabric for your table runner that will match with your dining chairs, as this will create a very harmonized appearance in your dining room. Another brilliant idea for adding a bit of versatility to your table runner is to use two coordinating fabrics instead of two fabrics that are the same.
What I mean is that by switching it up, you can have one design on the front and another on the back. You could flip it depending on the season, as you are shifting from winter colors into spring colors, or from summer colors into fall colors.
I also highly recommend using some excess fabric to make placemats and even fabric napkins. There is nothing better than a well-coordinated dining room where all of the colors meld in perfect harmony. Your guest will be extremely jealous.
Once you have mastered the art of making table runners, you can begin to explore even more decorative additions for all over your home. This could be the start of an exciting home makeover using nothing but your needle and your creative prowess.

