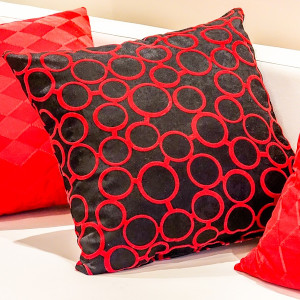
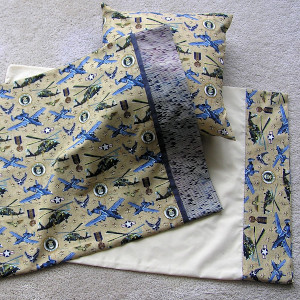
 If you have ever thought about designing your own bed sheets and pillows, you have probably wondered how to sew a pillowcase. Today, I am going to take you through all of the steps on how to sew your own unique pillowcase in a standard size.
Everyone knows you can never have too many pillows on your bed. Obviously, you need a body pillow to hug through the night, one pillow for the right side of your face, another pillow for the left side of your face, and three or four pillows scattered around just in case.
If you are a person who loves design, you probably would like to design your own bedroom. This means making pillowcases and bed sheets that match your personal style. To do this, first plan your fabrics and your design colors, then get your sewing machine ready.
Following these steps, you will be able to make an entire pillowcase in about 15 minutes. If you enjoy the tutorial, you may want to follow with making your own pillows to put inside of your new pillowcases. Let’s get started.
Making Your Own Pillowcase
First, you need to collect the materials. Here is a list of what you need:
- ¾ Yard Pillowcase Fabric (Width is 27” from Selvage to Selvage)
- ¼ Yard Cuff Fabric (Width is 9” from Selvage to Selvage)
- Accent Strip Fabric (Width is 2” from Selvage to Selvage) – Pressed in Half to Create a 1-Inch Folded Strip
In this tutorial, we are going to use the exact same fabric for the main pillowcase and for the cuff fabrics. However, you can choose whatever coordinating fabrics you desire. Do whatever makes you the most comfortable. The design of the pillowcase is totally up to you.
Step 1: Layer the Materials
The first step is to put your cuff fabric right side up on your workstation. You then want to layer the primary pillowcase fabric over the top of it, also right side up. Make sure the top raw edges are perfectly aligned. You also want to line up the edges of the accent strip, already folded, with the top edges of your other two fabrics. Now you are ready to go.
Step 2: Roll your Fabric
This is the part where you need to roll up your fabric. You want to start at the bottom and then work your way up, rolling your primary fabric panel into a compact tube that looks a lot like a burrito. You will stop rolling once you get to the center of the cuff fabric.
Step 3: Fold Cuff Fabric
Now it is time to bring the bottom edge of your cuff fabric up and then over your rolled fabric. You will align the edges and then pin them in place, making sure that the accent strip is completely trapped. Then move on to step 4.
Step 4: Sew the Edges
 You now need to stitch along the edges by using a seam allowance of ¼”. Alternatively, you can use a thread serger to complete the edge, seeing as thread sergers are better suited to working with edges. When you have completed this step, your pillow will look very much like a fabric burrito.
Step 5: Unroll the Fabric
Start by tugging the primary fabric still inside of the burrito shape, gently tugging until you have it all the way out of the tube. You want to pull and pull on your pillowcase to turn it inside out. When the fabric is completely unrolled, lay it flat and then press all the wrinkles out of it. While doing this, make sure that your accent strip lays totally flat and stays in the same direction.
Step 6: Trim
It is now time to trim your pillowcase to be approximately 28 inches in length. You want to measure from the very top of the cuff to the other end. After, fold your pillowcase in half with its right sides together. Any wrinkles that are left can be finger pressed out. You can then align the accent strip in such a way that either half is placed on top of the other half.
If you need to, it is totally fine to pin everything in place. Now trim the pillowcase so that it is approximately 20 inches in width, giving you a total width of exactly 40 inches.
Step 7: Finish
To finish your pillowcase, you can do it in a few different ways. The best way is with a serger. By using a serger, you will need to fold your pillowcase in half and then serge its edges only on the right sides and on the top. After, turn it right side out and press it.
Alternatively, you can use French seams. For this, you need to fold your pillowcase in half with the wrong sides together. This means the right sides will be facing outwards. Now stitch them together using a seam allowance of ¼ inch. Please note that you will only be sewing the two sides that still have raw edges. Then trim the raw edges so they are approximately ¼ inch.
 Step 8: Trap Your Edges
We are nearly done. Step 8 involves turning the pillowcase the wrong side out and gently poking the corners. Then you can press, and when you are done pressing you want to sew a 3/8” seam on the two sides that you sewed during the last step. This is going to trap your raw edges inside the pillowcase and make the finished edge extremely crisp.
Step 9: Turn & Press
This is the very last step. You want to flip your pillowcase the right side out and gently poke its corners. Press it one final time and you are finished. Now all you need to do is fill the pillowcase with a pillow.
You can continue to make your own pillow or simply use one you already have. Repeat this process to make as many pillowcases as you need. You can experiment with different sizes, different fabrics, and different designs. Just remember to have fun.


