
Among the necessary materials required while sewing for a project like a sewing machine, needle, thread, zipper’s foot, etc., another critical supply is the pinking shear.
Although they are commonly referred to as scissors, there are differences in them. Unlike scissors used in usual household utility, a pinking shear has saw-like teeth structures along with the blades instead of a straight edge.
Functions of Pinking Shears
The design of a unique scissor with teeth-like structures came to light in the late 1800s. They are helpful for quite a few functions.
- Used for cutting wool-based fabrics
- Minimizes loosening up of threads from edges
- Reduces the damage of sides with no hem
- Artistic cuts and patterns
- Makes sewing easier
- Used for forming fancy edges
The Distinction of a Pinking Shear from a Scissor
 In standard terms, both pinking shear and a scissor perform the same primary function: cutting through a sheet of fabric. But their characteristics distinguish them from each other.
- Scissors have blades fixed together, which are not more than 6 inches, whereas shears are longer than them.
- Both have handles, but shears have larger ones to help apply more force for cutting thicker materials.
- Pinking shears have specific functions to perform. However, a typical scissor has multiple usages.
Tailors and dressmakers mostly use pinking shears. With continuous use, they tend to become less sharp or blunt and need sharpening for a smooth and undisturbed cut. One can grind them through professionals, but when that is not possible, you must know how to sharpen pinking shears at home. Some processes are as below.
Aluminum Foil
To achieve immediate sharpness in the pinking shear, aluminum foil is the easiest trick. They are readily available in every household. Cut the foil with the shear for multiple times. Cutting ensures the whole length of the shear cuts through from the top edge till the last one. You may also fold the foil a few times to make it thicker and then cut through it. The friction caused shall give quick sharpness to it.
Sandpaper
One of the simplest remedies of sharpening a blunt object is using sandpaper. For a pinking shear, use sandpaper that has more grit. Fold it in two halves so that the blades of the shear get c from both sides. Rub to across the full length of the blade. Repeat the process for quite a few times. For better sharpness in the blades’ teeth, apply several cuts on the sandpaper with the shear’s total length.
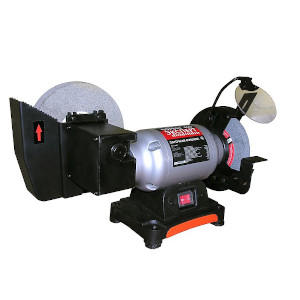
Sharpening Wheel
Although using a sharpening wheel is tough and needs practice; it is the most effective. For better results, you will need:
- A clamp
- A grinder
- Wheel
- Black Marker
Sharpening Pinking Shears: Steps
- Color the teeth of the pinking shear with a black marker from top to bottom.
- Set the clamp to 0 degrees
- Clamp up the marked blade of the shear against the sharpening wheel
- Using your hands, turn the wheel in a downward direction.
- Adjust the angle if the paint does not wipe out.
- Test it again.
- If the black mark scratches out, the angle is perfect now.
- Switch on the grinder.
- Move the attached blade from the left-hand side to the right side, i.e., from the bottom of the blade till the top edge.
- Repeat the process until all the black mark wipes out and then move on for the next blade of the pinking shear.
Tips for Using a Sharpening Wheel
- Do not sharp in the middle of the teeth of the pinking shear.
- Sharp the edges of the teeth only
- Shears are set at a particular angle- generally 0 to 5 degrees. Some may also be negative.
- Do not start sharpening the blades directly. Try it manually first for a single edge of any one tooth. This process is known as a scratch test.
- For proper visibility of the edges, mark it with a black marker.
- Set the clamp first at 0 degrees and then adjust it accordingly.
- Try not to tighten up the clamp too much that the blades cannot move.
- Readjust the angles if the marker does not disappear.
Tips for Manual Sharpening
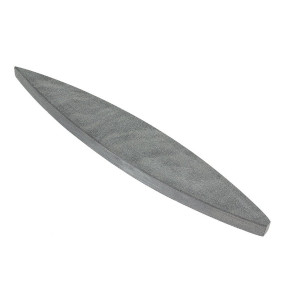 One can also use a whetstone for the procedure of how to sharpen pinking shears. Whetstones are stones with different shapes and sizes of grit particles in it. The process is as follows:
- Immerse the stone in water until bubbling forms.
- Using a screwdriver opens up the pinking shear.
- Face the blade toward the rough surface of the whetstone.
- Rub it on the grit particles for at least 20 times.
- Wipe it off with a fresh and clean towel or napkin.
- Repeat the same steps for the other blade of the pinking shear as well.
Pinking shears have three layers along the edges of the blade. The visibility of these metallic layers is an indication of whether the shear needs sharpening. An old shear needs frequent sharpening than a new one. The homely remedies are cost-effective. Although the sharpening wheel might be a bit costlier, once purchased, it is usable for many years.
How to Sharpen Pinking Shears: Final Thoughts
A pinking shear mostly reduces the fraying of the edges of the fabric. Especially the ones made of wool. In the absence of hem in the seam of the material, the fibers tend to become loose. So, to minimize this issue, use a pinking shear while cutting.
Regular maintenance of shear is necessary to obtain a smooth cut. Both professional, as well as simple sharpening methods, are available for the same purpose. To enjoy the experience of sewing keeps your essential supplies in a perfect condition. It will not only make the work easy but also enhance the ultimate look of the final product.

